


“The future belongs to young people with an education and the imagination to create.” — Barack Obama.
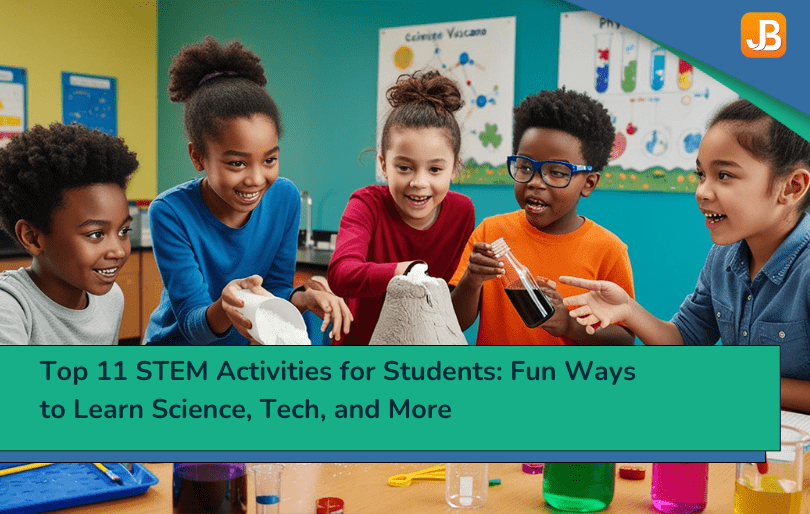
Hands-on STEM boosts problem-solving skills by 60% in early learners. That’s why STEM activities for students aren’t just fun—they’re essential. These fun and easy science activities, from building curiosity to developing critical thinking, lay the foundation for lifelong learning.
What is STEM? Exploring STEM education and its role in shaping future innovators is key to understanding why it matters, especially when starting with STEM activities for preschoolers. This guide focuses on real, practical ways to engage young minds at home or in the classroom.
We’re also committed to Maximizing Efficiency in STEM Education Programs by sharing tools that work.
Let’s explore 11 hands-on STEM activities that spark creativity, build real-world skills, and adapt to early elementary through middle school learners.
Why Hands‑On STEM Matters for Every Learner
“STEM activities spark curiosity and develop critical thinking, collaboration, and real-world problem-solving from preschool through middle school.”
“Kids are born curious. If you give them the tools, they will explore.” – Neil deGrasse Tyson
STEM isn’t just about teaching science or math. It’s about building thinkers who can adapt, invent, and solve problems no textbook can predict.
The Real Problems Hands-On STEM Solves:
- Short attention spans: Active tasks like building or testing keep students engaged longer than passive learning
- Lack of motivation in science/math: STEM becomes exciting when it’s connected to real things—rockets, slime, cars
- Struggle with abstract thinking: Kids see and feel concepts like gravity, friction, and energy in action
- Weak collaboration or communication skills: Team-based learning forces students to plan, delegate, and troubleshoot together
- Limited access to tech tools: Many STEM activities use everyday materials—paper, tape, straws—no expensive gear needed
And Why It’s So Effective:
- Encourages natural curiosity by letting kids explore instead of memorize
- Teaches persistence by normalizing trial, error, and redesign
- Builds early confidence in science and problem-solving, especially for students who don’t usually shine on tests
Hands-on STEM isn’t about giving answers but creating learners who know how to find them.
So, let’s explore 11 smart, simple STEM activities that build these skills in real, hands-on ways—right from home or the classroom.
Make an Easy DIY Marble Race Track: Discover Speed, Gravity, and More!
Scenario
Imagine you’re an engineer designing a roller coaster. What if you could control the speed of the cars just by changing the twists and turns? With a simple marble race track, you can experiment with the forces of gravity and motion that keep roller coasters racing!
Why This Matters
This fun STEM activity for elementary introduces the concepts of gravity and kinetic energy. By creating your race track, you’ll learn how speed changes depending on the shape and slope of the track. Plus, it’s a great way to practice creative problem-solving!
Learning Goals
- Understand how gravity and kinetic energy work.
- Develop critical thinking and problem-solving skills by experimenting with different designs.
- Practice basic math by timing how long the marble takes to complete the race.
- Encourage teamwork if done in a group setting.
Real-World Application
This activity helps children understand the basic principles behind transportation systems like roller coasters and cars, where engineers use the same forces to create safe and exciting rides.
Materials Needed
- Cardboard tubes (toilet paper or paper towel rolls)
- Tape
- Scissors
- Marbles
- A flat surface (wall or floor)
- Stopwatch (for timing, optional)
Steps
- Cut the cardboard tubes in half lengthwise to create the track pieces.
- Use tape to attach the tubes to the wall or create a freestanding structure on the floor. Try to make the track twist turn and have different slopes.
- Test the track by placing a marble at the top and letting it race down.
- Use a stopwatch to time how long the marble takes to reach the bottom. Adjust the angles or add obstacles to change the speed.
(For older kids) Measure the length of your track and calculate how fast the marble travels.
Exploration Questions
- What happens to the marble’s speed when you make the slope steeper?
- How does the track design affect how long the marble reaches the bottom?
Try This
- Create multiple paths and race different marbles! Which path is faster and why?
- Experiment with marbles of different sizes and weights to see how that affects speed.
- (For teachers) Turn this into a group activity. Each group designs its track and competes to see which team can build the fastest or most creative one!
Key Concepts: Gravity, Speed, Kinetic Energy, Math, Collaboration
Differentiation for Age Levels
- For younger students (ages 5-7): Focus on building and observing how the marble rolls without introducing complex calculations.
- For older students (ages 8-12): Add the math element, such as measuring speed, and challenge them to adjust the track to achieve specific goals (like slowing the marble down).
Make Your Slime: A Fun Chemistry Experiment!
Scenario
Imagine being a scientist in a lab, mixing ingredients to create something squishy and stretchy! In this DIY slime activity, you can explore how different substances react to form a new, fun material you can mold and play with.
Why This Matters
This simple experiment teaches basic chemistry concepts like polymers and chemical reactions. You’ll learn how combining different materials creates something new by making slime.
Learning Goals
- Understand the basics of chemical reactions.
- Learn about polymers and how they work.
- Practice fine motor skills through the slime-making process.
Real-World Application
Slime-making helps children understand the science behind materials we use daily, such as plastics and rubber, which are also polymers!
Materials Needed
- White glue
- Baking soda
- Contact lens solution
- Food coloring (optional)
Steps
- Pour ½ cup of white glue into a bowl.
- Add a few drops of food coloring if you’d like to make colored slime.
- Stir in 1 teaspoon of baking soda and mix well.
- Add 1 tablespoon of contact lens solution and stir until the slime forms.
- Knead the slime with your hands until it reaches the desired consistency.
Exploration Questions
- What happens when you add more baking soda or contact lens solution?
- How does the texture change when you knead it for longer?
Try This
- Add glitter or small beads for a fun texture!
- Test different amounts of ingredients to see how the slime’s consistency changes.
Key Concepts: Polymers, Chemical Reactions, Chemistry
Differentiation for Age Levels
- For younger students (ages 5-7): Focus on mixing and feeling the slime’s texture.
- For older students (ages 8-12): Discuss the chemistry behind slime and why the ingredients react the way they do.
Build a Paper Rocket: Explore Aerodynamics and Launch into Learning!
Scenario
Imagine being a rocket scientist designing a spacecraft for a mission to the moon! In this fun activity, you’ll learn how to create a simple rocket using paper and launch it into the air. Get ready to explore the basics of aerodynamics and flight!
Why This Matters
This STEM lesson teaches important concepts like aerodynamics, thrust, and gravity. By building and testing your rocket, you’ll understand how engineers design real rockets and spacecraft.
Learning Goals
- Learn about aerodynamics and how air resistance affects flight.
- Explore how thrust and gravity interact to propel objects into the air.
- Develop design thinking by testing and improving your rocket.
Real-World Application
This activity introduces students to the principles behind space exploration and aviation, giving them a glimpse into how scientists and engineers launch rockets.
Materials Needed
- Paper
- Tape or glue
- Straw (for launching)
- Scissors
- Markers (for decoration)
Steps
- Roll a piece of paper into a tube and tape it securely to create the rocket’s body.
- Cut out a triangle shape for the nose cone and attach it to one end of the rocket.
- Create small fins by cutting and attaching rectangles at the bottom of the rocket for stability.
- Insert the straw into the open end of the rocket. Now you’re ready to launch by blowing into the straw!
Exploration Questions
- How does changing the shape of the nose cone affect how far the rocket flies?
- What happens if you add more or fewer fins?
Try This
- Experiment with different paper types to see which creates a stronger rocket.
- Test how the length of the rocket affects its flight path.
Key Concepts: Aerodynamics, Thrust, Gravity, Engineering Design
Differentiation for Age Levels
- For younger students (ages 5-7): Focus on creating and decorating the rocket and observe how it flies.
- For older students (ages 8-12): Dive deeper into testing different designs and understanding how air resistance affects flight.
Build a Balloon Car: Discover Motion and Speed!
Scenario
What if you could make a car move using just air? In this fun activity, you’ll build a simple balloon-powered car and learn how forces like thrust and friction make things move. It’s time to create your mini race car!
Why This Matters
STEM activity for students introduces basic physics concepts like force, thrust, and friction. By building and testing your balloon car, you’ll understand how propulsion works and how cars use these forces to move.
Learning Goals
- Learn about thrust and how air can be used as a force to move objects.
- Explore the concept of friction and how it affects the car’s speed.
- Develop engineering skills by designing and improving the car’s structure.
Real-World Application
This activity helps children understand how cars and other vehicles move and how different forces like air and friction affect speed and movement.
Materials Needed
- Balloon
- Straw
- Tape
- 4 bottle caps (for wheels)
- Scissors
- Stiff paper or cardboard (for the car body)
- Wooden skewers (for the axles)
Steps
- Create the car body by cutting a piece of cardboard or stiff paper.
- Attach the bottle caps as wheels using the wooden skewers as axles.
- Tape a straw to the back of the car and attach a balloon to the straw’s end.
- Inflate the balloon by blowing it into the straw, then release it to see the car move forward.
Exploration Questions
- How does the size of the balloon affect how far the car travels?
- What happens if you change the wheels’ material?
Try This
- Add different types of wheels or axles and test which setup makes the car go faster.
- Test on different surfaces and observe how friction affects the car’s speed.
Key Concepts: Force, Thrust, Friction, Engineering Design
Differentiation for Age Levels
- For younger students (ages 5-7): Focus on building and testing the car and observe how the balloon’s air moves it.
- For older students (ages 8-12): Experiment with different designs to see how modifications impact speed and distance.
Build a Wind-Powered Car: Explore the Power of Air!
Scenario
Imagine designing a vehicle that moves with nothing but the wind! In this exciting activity, you’ll build a wind-powered car and explore how wind energy can make things move. Let’s discover how air can be a powerful tool in engineering!
Why This Matters
STEM lesson introduces key concepts like wind energy, force, and motion. By building your wind-powered car, you’ll learn how renewable energy can be used to power vehicles and machines.
Learning Goals
- Understand how wind energy can be used as a renewable power source.
- Explore the relationship between force and motion.
- Practice design thinking by building and improving your wind-powered car.
Real-World Application
This activity introduces students to renewable energy sources like wind power and shows them how engineers design systems to harness this energy for real-world applications.
Materials Needed
- Cardboard or stiff paper (for the car body)
- 4 bottle caps (for wheels)
- Wooden skewers (for axles)
- Tape
- Straw
- Scissors
- A small fan or large piece of paper (to act as the sail)
Steps
- Cut a piece of cardboard to create the body of the car.
- Attach the bottle caps as wheels using wooden skewers for axles.
- Use the straw to create a holder for the sail on top of the car body.
- Attach a sail made from a large piece of paper.
- Use a small fan or blow wind on the sail to move the car forward.
Exploration Questions
- How does the size of the sail affect the car’s speed?
- What happens if you change the shape of the sail?
Try This
- Experiment with different sail materials to see which works best.
- Test the car on different surfaces to observe how friction impacts its movement.
Key Concepts: Wind Energy, Force, Motion, Engineering Design
Differentiation for Age Levels
- For younger students (ages 5-7): Focus on building and observing how the wind moves the car.
- For older students (ages 8-12): Explore how different sail designs impact speed and direction.
Make an Anemometer: Measure Wind Speed with Science!
Scenario
Have you ever wondered how we measure wind speed? By building your own anemometer, you can learn how meteorologists measure wind and why it’s important for predicting weather. It’s time to explore the science behind wind power!
Why This Matters
STEM activity teaches how anemometers work, helping you understand the relationship between wind speed and weather patterns. You’ll explore concepts like motion, wind force, and data collection.
Learning Goals
- Understand how wind speed is measured using an anemometer.
- Explore the relationship between motion and force.
- Practice data collection by measuring wind speed at different locations.
Real-World Application
This activity introduces the concept of meteorology and the tools used to track and predict weather conditions, giving children insight into the science behind weather forecasts.
Materials Needed
- 5 small paper cups
- 2 straws
- Pencil with an eraser
- Pushpin
- Scissors
- Tape
Steps
- Cross the two straws as an “X” and tape them at the center.
- Tape a small paper cup to the end of each straw, ensuring all cups face the same direction.
- Using the eraser side, push a pencil through the center where the straws cross.
- Use a pushpin to secure the pencil to the straw “X” so the cups can rotate.
- Place your anemometer outside and watch it spin in the wind!
Exploration Questions
- How does the speed of the cups’ rotation indicate the wind speed?
- What happens if you place the anemometer in different areas?
Try This
- Track the wind speed over time to see how it changes throughout the day.
- Experiment with different cup sizes or materials to observe how that affects the rotation.
Key Concepts: Wind Speed, Force, Motion, Data Collection
Differentiation for Age Levels
- For younger students (ages 5-7): Focus on building the anemometer and watching it spin in the wind.
- For older students (ages 8-12): Record data on wind speed and analyze how different conditions affect the anemometer’s performance.
Build a Sailing Boat: Use Wind Power and Set Sail!
Scenario
Imagine being a shipbuilder, designing a boat that moves using only the power of the wind! In this fun activity, you’ll construct your sailing boat and discover how wind can be used to navigate the seas.
Why This Matters
This STEM activity for elementary students teaches the principles of wind power, buoyancy, and sailing. By designing your boat, you’ll learn how wind pushes the sails and how boats stay afloat.
Learning Goals
- Understand how wind moves a sailboat and affects its direction.
- Explore the concepts of buoyancy and balance.
- Develop design thinking by building and improving your boat’s sail.
Real-World Application
This activity introduces children to the science of sailing and boat engineering and the basics of maritime travel and renewable energy sources like wind.
Materials Needed
- Small plastic container (for the boat’s body)
- Straw (for the mast)
- Paper (for the sail)
- Tape
- Scissors
- Water basin or bathtub (to test the boat)
Steps
- Tape a straw to the bottom of the plastic container to form the boat’s mast.
- Cut a triangular piece of paper and tape it to the straw as the sail.
- Place the boat in the water and blow on the sail to move it across the surface.
Exploration Questions
- How does changing the sail’s shape affect the boat’s movement?
- What happens if you add weight to the boat?
Try This
- Experiment with different sail sizes and shapes to see which catches the wind best.
- Test the boat in different water conditions (e.g., calm vs. wavy) and observe how it floats.
Key Concepts: Wind Power, Buoyancy, Sailing, Engineering Design
Differentiation for Age Levels
- For younger students (ages 5-7): Focus on building and watching the boat move in the water.
- For older students (ages 8-12): Experiment with different sail designs and test how they impact speed and direction.
Build an Automatic Water Fountain Without Electricity: Discover Pressure and Flow!
Scenario
What if you could create a water fountain that works without electricity? In this activity, you’ll build an automatic water fountain powered by gravity and water pressure. It’s a great way to learn how these forces work together to move water.
Why This Matters
STEM lesson for elementary students explores the concepts of gravity, pressure, and fluid dynamics. Building this fountain lets you see how water can move continuously without power!
Learning Goals
- Understand how gravity and pressure work to move water.
- Explore the principles of fluid dynamics.
- Develop problem-solving skills by building and refining your water fountain.
Real-World Application
This activity teaches how natural forces, like gravity, are used in real-world systems such as irrigation, water towers, and fountains.
Materials Needed
- Two plastic bottles (one large, one small)
- Tubing or straws
- Scissors
- Tape
- Water
Steps
- Fill the giant bottle with water and place it on a higher surface.
- Connect the tubing from the bottom of the giant bottle to the small bottle below it.
- Tape the tubing securely and poke small holes at the top of the smaller bottle to allow air.
- Watch as gravity pulls water through the tubing, creating a simple automatic fountain.
Exploration Questions
- How does changing the height of the larger bottle affect water flow?
- What happens if you use a wider or narrower tube?
Try This
- Experiment with different bottle sizes and tube lengths to control the water flow.
- Add obstacles or filters to see how they impact the fountain’s operation.
Key Concepts: Gravity, Pressure, Fluid Dynamics, Engineering Design
Differentiation for Age Levels
- For younger students (ages 5-7): Focus on building the fountain and observing how gravity moves the water.
- For older students (ages 8-12): Explore how water pressure and gravity work together and try modifying the design.
Build a Creative Ferris Wheel: Explore Rotation and Balance!
Scenario
Have you ever been on a Ferris wheel? Now, you can build your mini-version! In this fun project, you’ll use basic materials to create a rotating Ferris wheel and learn how engineering concepts like rotation and balance work.
Why This Matters
Easy stem activity teaches key concepts like circular motion, balance, and engineering design. By creating your own Ferris wheel, you’ll learn how structures are built to rotate smoothly and stay balanced.
Learning Goals
- Understand the principles of rotation and balance.
- Explore how circular motion helps Ferris wheels move.
- Practice design thinking by constructing and refining your Ferris wheel.
Real-World Application:
This activity introduces children to the engineering behind amusement park rides and shows them how mechanical systems work in real life.
Materials Needed
- Cardboard
- Straws
- Scissors
- Tape
- Wooden skewers
- Paper cups (for the seats)
Steps
- Cut two large circles from cardboard to form the wheel.
- Attach the circles using straws for support.
- Poke holes in the edges of the wheel and attach small paper cups as seats using skewers.
- Use two additional straws to create an axle for the wheel to rotate on.
- Spin the wheel and observe how it rotates smoothly!
Exploration Questions
- How does the balance of the wheel affect its rotation?
- What happens if you add more or fewer seats?
Try This
- Experiment with different materials for the wheel to make it stronger.
- Test the rotation speed by changing the axle size.
Key Concepts: Rotation, Balance, Engineering Design
Differentiation for Age Levels
- For younger students (ages 5-7): Focus on building and spinning the wheel.
- For older students (ages 8-12): Explore how different designs affect the Ferris wheel’s rotation and balance.
Learn About the Properties of Magnets with a Magnetic Maze!
Scenario
Imagine guiding an object through a maze without touching it! In this activity, you’ll use a magnet to navigate a maze and learn how magnets attract and repel objects. It’s time to explore the invisible force of magnetism!
Why This Matters
This STEM activity for elementary students introduces key concepts like magnetism, attraction, and repulsion. By creating and solving a magnetic maze, you’ll discover how magnets work and what materials they interact with.
Learning Goals
- Understand how magnets attract and repel objects.
- Learn about magnetic fields and how they influence movement.
- Practice problem-solving by navigating the maze using a magnet.
Real-World Application
Magnets are used in countless devices, from compasses to electronics. This activity helps children understand the practical applications of magnetism in everyday life.
Materials Needed
- Paper (for the maze)
- A small metal object (like a paperclip)
- A magnet
- Tape
- Scissors
Steps
- Draw a simple maze on a piece of paper.
- Tape the metal object to the bottom of the paperclip.
- Place the magnet under the paper and move it to guide the paperclip through the maze.
- Try navigating the maze without touching the paperclip!
Exploration Questions
- How does the magnet’s strength affect how easily you can move the paperclip?
- What happens if you use different metals?
Try This
- Create more complex mazes with tighter turns and obstacles.
- Test different magnets to see how their strength affects the maze navigation.
Key Concepts: Magnetism, Attraction, Repulsion, Problem-Solving
Differentiation for Age Levels
- For younger students (ages 5-7): Focus on moving the paperclip through the maze with the magnet.
- For older students (ages 8-12): Experiment with stronger magnets and more challenging mazes.
Create a Lemon Battery: Power a Lightbulb with Chemistry!
Scenario
Imagine using a lemon to power a small lightbulb! In this activity, you’ll create a simple battery using a lemon and some common materials, exploring how chemical reactions can generate electricity. It’s a fun way to see science in action!
Why This Matters
This STEM activity teaches elementary students key concepts like electrochemistry, conductivity, and how chemical reactions produce energy. You’ll learn how to generate electricity using everyday items by creating a lemon battery.
Learning Goals
- Understand how electrochemical reactions create electricity.
- Learn about conductivity and how electrons move between materials.
- Practice building a simple circuit with natural materials.
Real-World Application
This activity introduces children to the basic principles behind batteries, which power devices such as phones and remote controls.
Materials Needed
- Lemon
- Copper coin or nail
- Zinc nail or screw
- Copper wire
- Small LED light or multimeter
Steps
- Insert a copper coin/nail and a zinc nail into opposite sides of the lemon.
- Attach copper wires to the ends of the nails.
- Connect the wires to a small LED or multimeter to see if electricity is being generated.
- Watch as the lemon powers the light!
Exploration Questions
- What happens if you use more lemons in a series?
- How does changing the materials (copper, zinc) affect the voltage?
Try This
- Test different fruits to see which ones produce the most electricity.
- Try adding multiple lemons together to create a stronger battery.
Key Concepts: Electrochemistry, Conductivity, Chemical Reactions
Differentiation for Age Levels
- For younger students (ages 5-7): Focus on building the battery and observing how it lights up.
- For older students (ages 8-12): Experiment with adding more lemons and measuring voltage.
Exploring STEM activities like building paper rockets or creating lemon batteries offers students engaging ways to learn key scientific principles. These hands-on experiences foster problem-solving and creative thinking, helping students develop a lifelong love for learning.
To take these STEM experiences to the next level, check out 8 Best STEM Summer Camps for Kidsfor additional opportunities.
For educators, streamline your STEM program registrations with Jumbula’s dedicated online tools, boosting efficiency and letting you focus on inspiring the next generation of innovators.
After exploring these hands-on STEM activities for students, the next step is creating structured opportunities for ongoing engagement, like STEM clubs and after-school programs.
Tips for Running STEM Clubs & After‑School Programs
STEM clubs aren’t just an add-on—they’re where students go beyond worksheets and start thinking like real scientists, engineers, and problem-solvers. The best clubs do more than offer exciting activities; they build confidence, teamwork, and resilience through structured exploration.
Whether you’re organizing STEM activities for preschoolers, primary students, or middle schoolers, the key is thoughtful design—not just in the activities, but in how the program runs.
A successful STEM club:
- Meets students where they are developmentally
- Offers variety while sticking to clear learning goals
- Minimizes logistical friction for families and educators
- Creates a space where every child feels safe to experiment and fail forward
And you don’t have to start from scratch. High-quality STEM resources for teachers and students—like ready-made activity templates, age-appropriate video demos, supply checklists, and classroom-tested lesson guides—can take the load off planning and help you focus on facilitation.
It all comes down to smart systems. Here’s how to build a club that’s smooth to run and packed with value for everyone involved:
Simplify Signups
Keep your registration process short and mobile-friendly—under two minutes if possible.
Pro tip: Online Registration software lets you manage signups, payments, and schedules all in one place.
Plan with Structure and Flexibility
- Organize by theme: motion, energy, chemistry, design
- Rotate between quick challenges and multi-session builds
- Cap sessions at 45–60 minutes with time for setup and cleanup
Group of Students Intentionally
- By age: Younger students focus on hands-on building; older ones can take on design goals and data tracking
- By interest: Let students pick focus areas like engineering, physics, or experiments
- Assign roles (Designer, Builder, Timekeeper, Reporter) to build accountability and teamwork
Use Accessible Materials
Many great STEM activities for students at home or in clubs require only simple items: cardboard, tape, marbles, paper cups, balloons, etc. Keep a shared supply bin to make setup easier every time.
Keep Parents in the Loop
Send a quick weekly update on what students did, what they learned, and how it connects to real-world STEM. A simple message goes a long way in building engagement and support.
STEM Club Starter Kit (No Downloads Needed)
You don’t need fancy tools or a big budget to run a successful STEM club. You can follow a simple, plug-and-play framework—right here on the page.
Weekly STEM Plan (4 Sample Themes)
- Week 1 – Motion & Speed: Balloon cars, marble race tracks
- Week 2 – Energy & Force: Wind-powered cars, lemon battery
- Week 3 – Chemistry in Action: DIY slime, chemical reactions
- Week 4 – Engineering & Design: Paper rockets, Ferris wheels, boat building
Supply Strategy
- Basic materials: cardboard, paper, tape, scissors, straws, glue
- Extras: balloons, plastic cups, marbles, baking soda, vinegar
- Keep a reusable STEM bin for grab-and-go access
Grouping and Roles
- Group by age or interest
- Assign rotating roles: Designer, Timekeeper, Tester, Note-Taker
- Encourage peer teaching by pairing different skill levels
Scheduling Hacks
- 45–60 minutes per session
- Leave time for testing, troubleshooting, and sharing
- Mix fast-paced challenges with slower builds
Parent Communication
Weekly message includes:
- What students built
- What concept did they explore
- Why it matters in the real world
When designed well, a STEM club becomes more than a weekly activity—it becomes a launchpad for curiosity, creativity, and confidence. And with the right systems in place, running it doesn’t just get easier… it becomes something you’ll look forward to every week.
Still have questions? Here are a few quick answers to help you get started.
Frequently Asked Questions About STEM Activities
STEM learning can look different for every age, budget, and setting. Here are clear answers to some of the most common questions from educators and parents.
What are the best low-cost STEM activities for students?
Some of the best low-cost STEM activities use everyday materials and still deliver high-impact learning. Great options include:
- Balloon-powered cars teach force and motion using straws, balloons, and bottle caps
- DIY slime – explores chemistry with glue, baking soda, and contact solution
- Paper rockets – demonstrate thrust and aerodynamics using only paper and tape
- Magnetic mazes – introduces magnetism and spatial reasoning with simple paper and magnets
These activities are budget-friendly, hands-on, and highly adaptable across grade levels.
How can parents support STEM learning at home?
Parents can support STEM learning by:
- Encouraging curiosity through everyday problem-solving and “what if” questions
- Offering a small set of reusable materials (tape, paper, marbles, string, etc.) for experimentation
- Doing short activities together from online guides or videos
- Celebrating effort and experimentation over perfect results
- Creating a regular “STEM time” each week, even 20–30 minutes, can build confidence
These simple steps make STEM activities manageable and meaningful for students at home.
What age is best to start STEM activities?
STEM can begin as early as preschool. STEM activities for preschoolers focus on exploration—stacking, sorting, pouring, and basic building. As children grow, you can gradually introduce concepts like measurement, cause and effect, and experimentation. The key is matching activities to developmental stages and keeping it hands-on and fun.
How do I manage different age groups in the same STEM club?
Group students by age or ability when possible, and use tiered challenges. For example:
- Younger students can build the structure (like a marble track)
- Older students can handle measuring speed or redesigning for efficiency
Assign mixed-age teams with rotating roles to promote collaboration. Using flexible, scalable activities ensures every student is engaged at their level.
With the right approach, STEM becomes more than a subject—it becomes a mindset. Start small, stay curious, and let hands-on learning lead the way.
Wrap Up
Introducing STEM activities for elementary students is a great way to inspire curiosity and teach key scientific skills. This article explored 11 hands-on activities, such as building balloon cars, creating slime, and making a lemon battery—all practical and fun ways to engage students.
The Importance of STEM Education: Preparing the Next Generation for a Technology-Driven World is undeniable.
Simplify your program management with Registration Software for STEM Programs by Jumbula. Start your 14-day free trial today, boost efficiency, and focus on nurturing tomorrow’s innovators.


2 thoughts on “Top 11 STEM Activities for Students”
I would like to say great blog!
Thank you so much — glad you’re enjoying the blog!